Exp Empty Table in Oracle11gR2

先来看一下例子。我们创建一张表T2。

[sourcecode language=”sql” light=”true”]SQL> create table t2 (n number);

Table created.

SQL> desc t2
Name Null? Type
—————————————– ——– —————————-
N NUMBER[/sourcecode]

尝试使用exp将此表导出。

D:\Temp>exp kamus/oracle tables=t2

Export: Release 11.2.0.1.0 - Production on Fri Apr 16 18:11:51 2010

Copyright (c) 1982, 2009, Oracle and/or its affiliates.  All rights reserved.


Connected to: Oracle Database 11g Enterprise Edition Release 11.2.0.1.0 - 64bit Production

With the Partitioning, Oracle Label Security, Data Mining and Real Application Testing opt
ions
Export done in ZHS16GBK character set and AL16UTF16 NCHAR character set

About to export specified tables via Conventional Path ...
EXP-00011: KAMUS.T2 does not exist
Export terminated successfully with warnings.

报错说这张表并不存在。这是让很多客户费解的地方,在测试库中创建应用的表结构,然后再将表结构exp到产品库中去,这是很多客户常用的方法,但是在11gR2中如果这些表是新创建的没有插入过任何一条记录,那么将会碰到上面这样的错误。

原因在于11gR2中的新功能 – Deferred Segment Creation(延迟段创建),默认情况下这个功能是启用的。

[sourcecode language=”sql” light=”true”]SQL> show parameter DEFERRED_SEGMENT_CREATION

NAME TYPE VALUE
———————————— ——————– ——————–
deferred_segment_creation boolean TRUE[/sourcecode]

延迟段创建的含义是当此新创建一个可能会有Segment的对象时(比如表、索引、物化视图等),如果这个对象中还没有任何记录需要消耗一个Extent,那么将不会在创建对象时自动创建Segment,这样做的好处无疑是在创建对象时大大提高了速度。

对于上例中的T2表,我们在创建结束就立刻检查DBA_SEGMENTS视图,会发现没有任何记录。

[sourcecode language=”sql” light=”true”]SQL> select segment_name from user_segments where segment_name=’T2′;

no rows selected[/sourcecode]

而对于exp程序而言,当仅仅存在Object的定义而没有相应的Segment时,就会报出EXP-00011对象不存在的错误。

解决方法就很简单了,以下方法任选其一。

1. 设置DEFERRED_SEGMENT_CREATION为FALSE,这样创建对象时就会自动创建Segment

2. 在创建对象时,明确指定立刻创建Segment
[sourcecode language=”sql” light=”true”]create table t2 (n number) SEGMENT CREATION IMMEDIATE;[/sourcecode]

3. 使用expdp替代exp(Datapump本身就是Oracle10g以后的推荐工具)

D:\Temp>expdp kamus/oracle tables=t2

Export: Release 11.2.0.1.0 - Production on Fri Apr 16 18:14:41 2010

Copyright (c) 1982, 2009, Oracle and/or its affiliates.  All rights reserved.

Connected to: Oracle Database 11g Enterprise Edition Release 11.2.0.1.0 - 64bit Production

With the Partitioning, Oracle Label Security, Data Mining and Real Application Testing opt
ions
Starting "KAMUS"."SYS_EXPORT_TABLE_01":  kamus/******** tables=t2
Estimate in progress using BLOCKS method...
Processing object type TABLE_EXPORT/TABLE/TABLE_DATA
Total estimation using BLOCKS method: 0 KB
Processing object type TABLE_EXPORT/TABLE/TABLE
. . exported "KAMUS"."T2"                                    0 KB       0 rows
Master table "KAMUS"."SYS_EXPORT_TABLE_01" successfully loaded/unloaded
******************************************************************************
Dump file set for KAMUS.SYS_EXPORT_TABLE_01 is:
  D:\ORACLE\ADMIN\ORCL\DPDUMP\EXPDAT.DMP
Job "KAMUS"."SYS_EXPORT_TABLE_01" successfully completed at 18:15:10

Update@2012-05-29
在最新的11.2.0.3中,该问题已经不再存在,即使没有segment,用exp也仍然可以正常导出。

SQL> host exp kamus/oracle tables=t_test

Export: Release 11.2.0.3.0 - Production on Tue May 29 14:56:21 2012

Copyright (c) 1982, 2011, Oracle and/or its affiliates.  All rights reserved.


Connected to: Oracle Database 11g Enterprise Edition Release 11.2.0.3.0 - 64bit Production
With the Partitioning, Oracle Label Security and Real Application Testing options
Export done in US7ASCII character set and AL16UTF16 NCHAR character set
server uses UTF8 character set (possible charset conversion)

About to export specified tables via Conventional Path ...
. . exporting table                         T_TEST          0 rows exported
Export terminated successfully without warnings.

SQL> select segment_name from user_segments where segment_name='T_TEST';

no rows selected
How to Use Oracle Restart in Oracle 11gR2

Oracle Restart是数据库组件监控方法向单实例数据库中的延展,之前srvctl命令可以用来管理RAC数据库中的各个组件,安装了Oracle Restart之后,对于单实例数据库组件(包括数据库实例,监听,ASM实例,ASM磁盘组,自建Service等)也可以使用srvctl命令来管理,同时Oracle会在这些组件发生意外关闭的时候自动重新启动。对于在Linux单机上安装的Oracle Instance,以前需要配置dbstart或者dbstop脚本来实现在操作系统起停时自动起停数据库实例的操作,现在通过Oracle Restart则无需这两个脚本了。

详细文档请参看 About Oracle Restart

安装其实很简单,实际上没有单独安装Oracle Restart的过程,只需要安装Oracle Grid Infrastructure就可以,在安装的时候选择“仅安装网格基础结构软件”,我们的测试环境没有使用ASM,因此选择只安装软件可以跳过配置ASM的步骤。

如何在Windows单机上测试ASM,感兴趣的朋友可以参看 – How to use Files in place of Real Disk Devices for ASM

在安装完GI以后,还需要使用root用户运行以下脚本,否则在$GI_HOME/bin目录中不会生成例如crsctl,crs_start之类的脚本,当然Oracle Restart也不会启动。

# $GRID_HOME/crs/install/roothas.pl

在运行完roothas.pl以后,可以使用crsctl命令来查看HAS(High Availability Services)的运行情况。

$ crsctl status res -t
--------------------------------------------------------------------------------
NAME           TARGET  STATE        SERVER                   STATE_DETAILS       
--------------------------------------------------------------------------------
Local Resources
--------------------------------------------------------------------------------
ora.ons
               OFFLINE OFFLINE      solaris                                      
--------------------------------------------------------------------------------
Cluster Resources
--------------------------------------------------------------------------------
ora.cssd
      1        OFFLINE OFFLINE                                                   
ora.diskmon
      1        OFFLINE OFFLINE                                                   
ora.evmd
      1        ONLINE  ONLINE       solaris 

我们是在创建完数据库之后再安装Grid Infrastructure的,因此还需要手工将数据库实例和监听加入Oracle Restart配置中,根据文档如果是在装完Grid Infrastructure之后再用netca创建监听,dbca创建数据库的话,将会自动加入Oracle Restart中,我个人没有测试。

添加数据库实例:

srvctl add database -d orcl -o D:\oracle\product\11.2.0\dbhome_1

检查配置情况:

D:\Temp>srvctl config database -d orcl
数据库唯一名称: orcl
数据库名:
Oracle 主目录: D:\oracle\product\11.2.0\dbhome_1
Oracle 用户: system
Spfile:
域:
启动选项: open
停止选项: immediate
数据库角色: PRIMARY
管理策略: AUTOMATIC
磁盘组:
服务:

检查数据库实例状态:

D:\Temp>srvctl status database -d orcl
数据库正在运行。

注意:如果在添加数据库实例之前数据库实例已经启动了,那么需要重新启动一次数据库,Oracle Restart才能正确监视到数据库实例状态。

添加监听:

srvctl add listener -o D:\oracle\product\11.2.0\dbhome_1

注意,如果是分用户安装(比如在Linux操作系统中),比如GI以grid用户安装,Oracle Database以oracle用户安装,那么在添加监听的时候应该指定GI_HOME,而非ORACLE_HOME。命令如下:

$ srvctl add listener -o /u02/app/oracle/product/11.2.0/grid

否则在用srvctl start listner命令启动监听的时候,会报错。

$ srvctl start listener
PRCR-1079 : Failed to start resource ora.LISTENER.lsnr
CRS-5010: Update of configuration file "/u01/app/oracle/product/11.2.0/db_1/network/admin/listener.ora" failed: details at "(:CLSN00014:)" in "/u02/app/oracle/product/11.2.0/grid/log/solaris/agent/ohasd/oraagent_grid/oraagent_grid.log"
CRS-2674: Start of 'ora.LISTENER.lsnr' on 'solaris' failed

如果在添加监听的时候,监听已经启动,那么会遇到PRCN-2065错误,停止监听以后再次添加即可。

D:\Temp>srvctl add listener -o D:\oracle\product\11.2.0\dbhome_1
PRCN-2061 : 无法添加监听程序 ora.LISTENER.lsnr
PRCN-2065 : 端口 1521 在指定的节点上不可用
PRCN-2035 : 端口 1521 在节点或虚拟主机上不可用: Kamus-PC

配置完毕以后,就可以通过srvctl命令起停数据库实例和监听了。

srvctl start|stop database -d 
srvctl start|stop listener [-l ]

可以通过crs_stat命令查看Oracle Restart管理的各个资源情况,这以前是我们查看Oracle Clusterware的方式。

D:\Temp>crs_stat -t
Name           Type           Target    State     Host
------------------------------------------------------------
ora....ER.lsnr ora....er.type ONLINE    ONLINE    kamus-pc
ora.cssd       ora.cssd.type  ONLINE    ONLINE    kamus-pc
ora.orcl.db    ora....se.type ONLINE    ONLINE    kamus-pc

测试Oracle Restart的功能,我们可以在后台进程中直接杀死oracle.exe,可以观察到数据库实例立刻会重新启动。

注意:所有在SQL*PLUS中发出的关闭数据库命令均不会导致Oracle Restart重启实例,包括shutdown abort。

如果暂时不想用Oracle Restart管理某个资源,可以通过srvctl disable命令暂时禁用,需要的时候再enable即可。

srvctl disable database -d orcl

如果机器名称发生了改变,需要重新配置Oracle Restart,请参考Metalink Note [ID 986740.1]

How to Install and Use Oracle Configuration Manager

Oracle将之前的Metalink站点升级为My Oracle Support(MOS),借助Flash来获得一些更丰富的用户体验。而其中的Oracle Configuration Manager(OCM)是很重要的一个战略步骤。

通过OCM将客户的产品环境配置(不但包括数据库,还有App Sever等)上传之后,在MOS上对于SR的操作(新建,检索)都可以基于OCM System来进行,直接取代了之前的porfile。OCM还有其它更进一步的用途,在这里不再赘述,本文仅仅梳理出简单的OCM安装及使用方法。

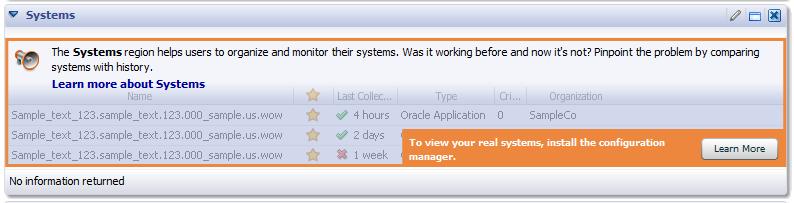
在我们没有配置OCM之前,每次登入MOS页面,可以看到大致如下面的页面。

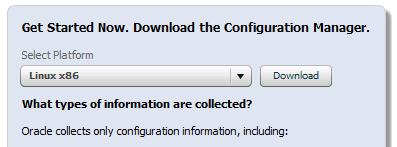
这一部分正是在提醒你安装configuration manager,点击“Learn More”之后将会跳转到OCM的主题页面,在这个页面上可以找到下载的链接,OCM的介绍,OCM的详细文档。

下载适合自己服务器构架的OCM包以后,安装非常简单,将下载的zip包解压即产生ccr文件夹,将ccr文件夹copy到$ORACLE_HOME下。本文在Windows下测试,如果是UNIX/Linux系统将exe变为sh即可。

注意:在Oracle11g之后,OCM安装包应该已经内置在Oracle Software中,我们只需要检查$ORACLE_HOME下有没有ccr目录即可,如果有说明已经存在安装包,可以直接进行安装。

安装OCM(以下命令没有明确指出的均在ccr/bin目录下执行):

setupCCR -s -d

-d表示以disconnected方式安装OCM,这样的安装会快些。

配置OCM

configCCR 12345678 kamusis@gmail.com us

其中12345678为CSI号,kamusis@gmail.com为登陆MOS的用户名,us为国家(这个没关系随便填)

注意:安装OCM的这台机器应该可以直接连接上internet,否则可以跳过configCCR,直接使用disconnected方式,也就是需要手工上传OCM收集的配置信息。

测试OCM和MOS正常连接

emccr test

Instrument Database(RAC环境只需要在1个节点上执行)

cd ccr\admin\scripts
installCCRSQL.exe collectconfig -s orcl11g -r sys

-s后面需要指定需要收集信息的数据库实例名
-r后面需要指定SYSDBA用户

注意:OCM安装使用文档中提到在Oracle10.2.0.4以后不需要再手工Instrument Database,但是实际上在Oracle11g中存在bug,installCCRSQL脚本仍然是必须执行的。

收集信息并自动上传

emccr collect

正常收集并上传以后会看到“Collection and upload done.”字样。

查看目前OCM在收集的所有target

emccr disable_target

直接回车不disable任何target,就可以看到所有的target列表。在我的例子中,输出如下:

Oracle Configuration Manager - Release: 10.3.2.0.0 - Production
Copyright (c) 2005, 2009, Oracle and/or its affiliates.  All rights reserved.
------------------------------------------------------------------
No.        Category                     Target Name
0          Host                         kamus-pc
1          Database Instance            ORCL11G
2          Oracle Home                  OraDb11g_home1
3          Oracle Configuration Manager Oracle Configuration Manager

Press Enter to exit the command.
Use Comma to separate multiple target numbers.
Enter the number(s) corresponding to the target(s) you wish to disable:

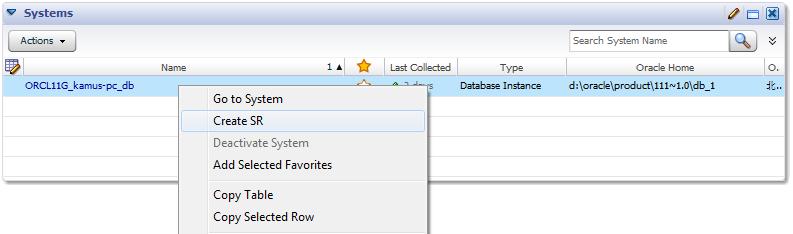
然后等待一段时间,Oracle官方说是大概2个小时,就可以在MOS System page中看到自己的系统了,右键点击系统可以有各种进一步的操作。至此简单的OCM安装和配置就已经完毕了。

修改OCM收集频率

emCCR set collection_interval="FREQ=MONTHLY; BYMONTHDAY=1; BYHOUR=0; BYMINUTE=0"

默认安装以后,是每天在安装时刻进行collection,这个频率可能有些高。我们修改为每个月的1号凌晨0点收集信息。

查看OCM状况

emccr stauts

解决升级后警告信息
如果使用旧版本的OCM做过instrument database,之后才将OCM升级为新版本,那么再次执行emCCR status的时候可能会发现如下告警:

WARN: Oracle Configuration Manager database objects are not in sync with
the installed configuration collection scripts.
Refer to the Installation and Configuration documentation on reloading the
SQL collection packages.

只需要将installCCRSQL再运行一遍即可。

\admin\scripts\installCCRSQL.exe collectconfig -s  -r